Showing posts with label PowerApps. Show all posts

Sunday, 19 July 2020

Coalesce in Power apps - Power Platform

Hi Everyone,

As we all know how we Coalesce() function in SQL, it returns the first non-null value in a list.

For example : If we run the below query, will get the results as StatureStack.com

SELECT COALESCE(NULL, NULL, NULL, 'StatureStack.com', NULL, 'mscrmtechie.blogspot.com');

In simple words, it just returns whatever the first non-null value.

In the same way, we can use Coalecse function in Power Apps formulas as well. Today, I have two variables which has been set from different logic and I had to write the formula to get the not null value between two of them. I used below formula to get the not null value between two variables.

Coalesce(variable1, variable2, ...)


Here is more information from Microsoft Docs

Hope this helps.

--
Happy 365'ing
Gopinath.

Friday, 17 July 2020

Canvas App showing loading icon on Dynamics 365 CE forms - Power Platform

Hi Everyone,

Today I was working on simple Canvas App and I have to show it on Model Driven Form on Dynamics 365 CE. I have published the Canvas App, copied the URL and did set to the IFrame on the form. Here is the configuration of the same.

I have saved the Form, Published and navigated to the Account page. To my surprise, it started showing only loading icon.

I was thinking something going at the Canvas App side but when I play, it is working fine. Came to the conclusion that certainly some thing from Dynamics side is blocking the content. And finally, it is Cross-frame Script which is blocking the content. After un-checking "Restrict cross-frame scripting, where supported. " checkbox everything started working.

Hope this helps.

--
Happy 365'ing
Gopinath.

Set Canvas App URL on Dynamics 365 CE - Power Platform

Hi Everyone,

Today I was talking to one my friends on the deployment of Canvas Apps that were configured as an IFrame on Model Driven Forms of Dynamics 365. The problem with this is, every time deployment happens the URL would be overridden and we have to manually open the properties of IFrame to set it to the right one.

We can write JavaScript to retrieve the URL  from some configuration/setting entity but every time, the call would be executed which we don't want. Here comes our friend Session Storage to help use.

We have added the piece of code to set the URL that is retrieved as Session Storage item and using it to setSrc instead of retrieving Settings/Configuration record every time. In fact, this solution all configurations whatever we are retrieving, we can use SessionStorage or LocalStorage based on the scenario which will eventually reduces the calls from client side and hence improves the performance. 

The only you should remember is to use Unique Name for the session variable, I normally use combination of OrganizationID and Configuration name.

Here is the code for your reference. First checking for the value in the Session Storage and if it contains value, taking it from there otherwise retrieve it and set to IFrame src as well as SessionStorage item with unique name to use next time.


function setCanvasAppsURL(executionContext, controlName, ConfigName) {
    var organizationSettings = Xrm.Utility.getGlobalContext().organizationSettings;
    var formContext = executionContext.getFormContext();
    var sessionVariable = organizationSettings.organizationId + ConfigName;
    var sessionVariableValue = sessionStorage.getItem(sessionVariable);
    var url = null;
    if (ConfigName != null && sessionVariableValue == null) {
        ///Get config value from configuration
        var globalContext = Xrm.Utility.getGlobalContext();
        var parameters = {};
        parameters.ConfigName = ConfigName;
        var req = new XMLHttpRequest();
        req.open("POST", globalContext.getClientUrl() + "/api/data/v9.1/SettingsEntity", true);
        req.setRequestHeader("Accept", "application/json");
        req.setRequestHeader("Content-Type", "application/json; charset=utf-8");
        req.setRequestHeader("OData-MaxVersion", "4.0");
        req.setRequestHeader("OData-Version", "4.0");
        req.onreadystatechange = function () {
            if (this.readyState == 4) {
                req.onreadystatechange = null;
                if (this.status == 200 || this.status == 204) {
                    if (JSON.parse(this.response).ConfigKey != null) {
                        url = JSON.parse(this.response).ConfigKey;
                        if (url != null) {
                            if (formContext.getControl(controlName) != null && formContext.getControl(controlName) != undefined) {
                                formContext.getControl(controlName).setSrc(url);
                                sessionStorage.setItem(sessionVariable, url);
                            }
                        }
                    } else {
                        console.log("Error");
                        Xrm.Utility.closeProgressIndicator();
                        var alertStrings = {
                            confirmButtonLabel: "Ok", text: "Error : " + JSON.parse(this.response).error.message
                        };
                        Xrm.Navigation.openAlertDialog(alertStrings);
                    }
                }
            }
        };
        req.send(JSON.stringify(parameters));
    }
    else
    {
        formContext.getControl(controlName).setSrc(sessionVariableValue);
    }

}

Hope this helps.

--
Happy 365'ing
Gopinath

Change screen size of Canvas App - Power Platform

Hi Everyone,

Today I was on embedding a Canvas App on Dynamics 365 CE forms using Model Driven Form Integration and while creating the Canvas App, it has opened in the mobile layout but as per my requirement I need tablet layout.

After some search came to know change the layout from File --> Settings --> Screen size + orientation.

Check this link for more information.

Hope this helps.

--
Happy 365'ing
Gopinath.

Monday, 13 July 2020

How to get the count of items in a Collection - Canvas App/Power Apps - Power Platform

Hi Everyone,

Today I was working on CanvasApp and I have to show the count of the items in the  collection on UI. This can be done easily by using the below formula.
CountRows(CollectionName)

I have given Text property of the label as below and here the result is showing the count.


Check this post on how to get and show the Dynamics 365 CE records using flow on Canvas App. 

--
Happy 365'ing
Gopinath

Sunday, 12 July 2020

Get the records from Power Automate (List Records) and display them on the Gallery - Power Platform - Dynamics 365, CDS, Power Automate and Canvas App

Hi Everyone,

In this post, let's try to understand the steps that are needed to get the data from Power Automate using Common Data Service List Records Action and show the same on the Canvas App Gallery.

As a first step, let's build Power Automate to get records from Dynamics 365. 

Take a trigger as a PowerApps as we would calling this flow from Canvas App.

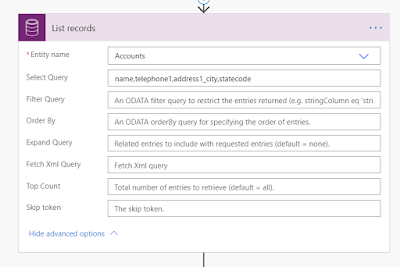
Add Common Data Service Current Environment Connector and List Records step by defining the entity and fields you would like to get.

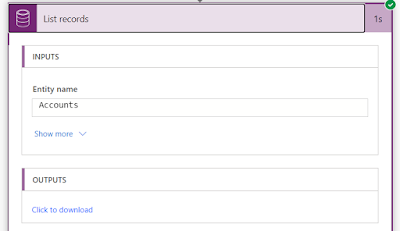
Run the flow to get the results so that you can generate JSON Schema with that. 
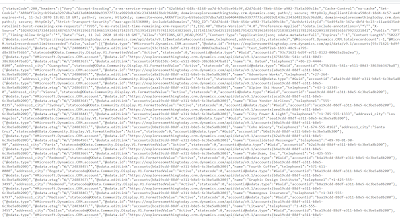
Expand List Records step and click on Download link. It will open the JSON results in the browser window.


Select one record from the result and copy, we will use it to generate schema.

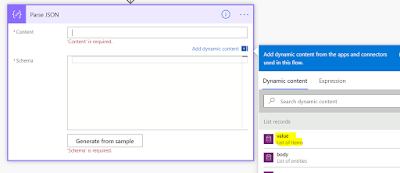
Add Parse JSON step in the flow as next step and take values from List Records steps as an Input to the step.

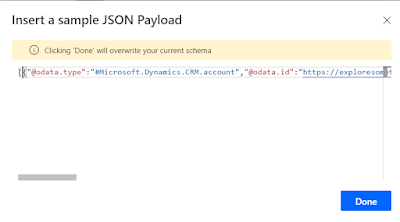
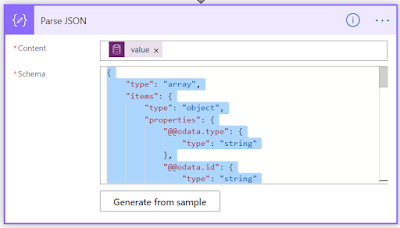
Click on "Generate from Sample" button on Parse JSON step and put the JSON data that was copied by adding "[" as a starting character and "]" as an ending character so that the result would be converted to an Array.

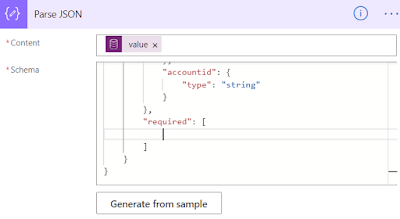
Once the Schema is generated, make sure you remove the column names in the Required property otherwise your flow would fail with error "Required Properties are missing from object" if some values comes as blank in the result. 


Run the flow once to check the output from Parse JSON step.
The flow ran successfully and you would be able to see the output from Parse JSON step.

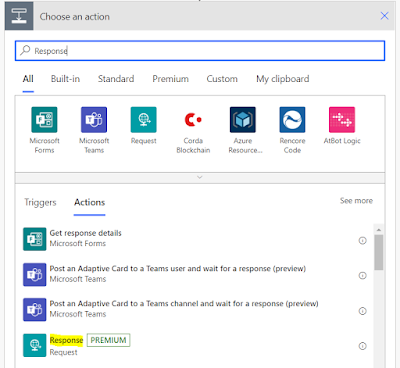
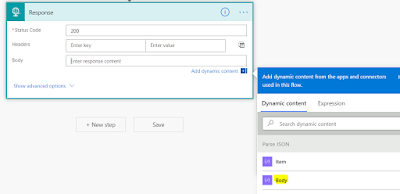
Edit the flow and add Response Step, set Body of Response to Body of Parse JSON step.


Click on Show advanced options link and copy the schema from Parse JSON step and put it here.
Save the flow.

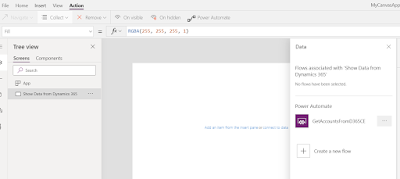
Let's create a new Canvas App and add go to Action, Power Automate which will show the list of the flows in your environment.

Select the flow that you would want to use and after adding the flow to Canvas App, provide Parameters if you have any otherwise close the command with parenthesis.

As we need to bind the data to Gallery, we need a Collection object. Let's push the result from flow to a collection. To test the things easily, I have added a button and OnSelect of the button given below statements. This will get the result from flow and assign it to the collection.

ClearCollect(DataFromFlowCollection, GetAccountsFromD365CE.Run());

Let's test it once before we add Gallery to the app. Play the app and click on the button. After the execution, go back to edit mode --> View --> Collections, you can preview the data.

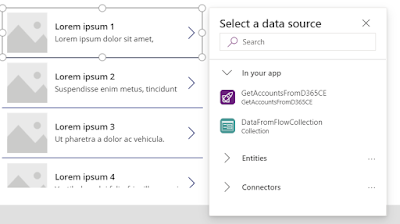
We are able to get the data from flow to CanvasApp, let's add Gallery and bind the collection as a Data Source to it.

You can click on Edit link beside Fields and select which fields you would like to display.

Let's play the App and click on Get Data button to show the data on Gallery.

Hope this helps.

--
Happy App Development
Gopinath

Saturday, 11 July 2020

Set Label Text on a Button Click or Select - Power Platform - Canvas Apps


Hi Everyone,

I have started on PowerApps and as I am newbie on this, I am trying to understand the things clearly before we do.

Today I got a requirement to set the label text to something onclick of a button, oh.. sorry.. onselect of a button(powerapps terminology :)). I thought, it would be the same way of the statement which we are so used and have written below statement onselect.

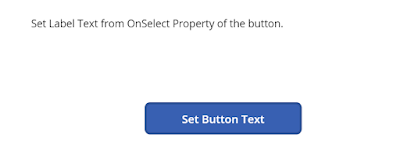
lblTextToShow.Text = "Set Label Text from OnSelect Property of the button."

And, it didn't work. After some search, understood that we cannot change the text directly like above and we have to use a Variable to do the same.

We have to set the Text property of the label to the Variable (Global or Context) and change the value of the Variable OnSelect of the button and label text would change automatically.

On the Form OnVisible property have given the below formula to set the variable value to Blank() and assigned the same variable to Label Text property on OnSelect Property of the button by setting the value that I want.


Hope this helps.

--
Happy App Developing
Gopinath

Tuesday, 23 June 2020

Display Components in Default Solution by Component Type in New Solution UI - Make.PowerApps.com

Hi Everyone,

I was checking the default solution in new UI, I need to check flows we have in the system. I am very new this UI and it took time for me to understand how can get the list of components by component type.

In Classic Editor, the left navigation pane helps to select the component and the canvas would show the selected component types. 

If you want to check the components by component type on new UI, you have to click on small Arrow icon beside Search on right side and it provides the option to select the component type.


Hope this helps.

--
Happy 365'ing
Gopinath

Friday, 19 June 2020

Power Platform Analytics - Common Data Service, Power Automate and Power Apps

Hi Everyone,

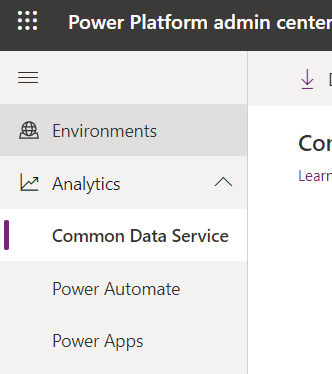
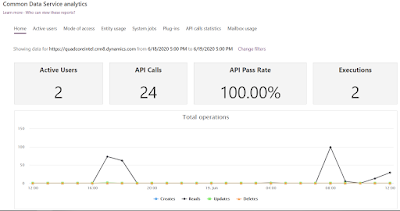
Today I was going through Power Platform Admin Center and checked Analytics from the navigation. I remembered the days where we used to install Organization insights managed solution and check active/inactive users, storage usage, plugins success rate etc.

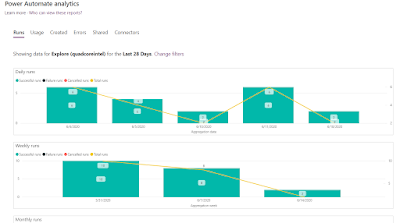
Now, we don't need any solution to install and there are lot more useful information to understand the system health from these analytics.

There are three analytics available, check Microsoft Docs (links below) to understand more on the roles that are needed to view the analytics and the information that would be provided.

1) Common Data Service  - Microsoft Docs Link

2) Power Automate  - Microsoft Docs Link

3) Power Apps  - Microsoft Docs Link

Hope this helps.

--
Happy 365'ing
Gopinath

Wednesday, 17 June 2020

Collect and ClearCollect in PowerApps

Hi Everyone,

In this post, will try to understand as much as possible on Collect and ClearCollect functions in PowerApps.

Collect and ClearCollect functions are useful for when we want an in-memory store for data. They can save Collections and can be accessed from any screen in the App.

Here is the syntax

Collect(collectionName, Items)
ClearCollecct(CollectionName, Items)

These functions can be used to store JSON data.

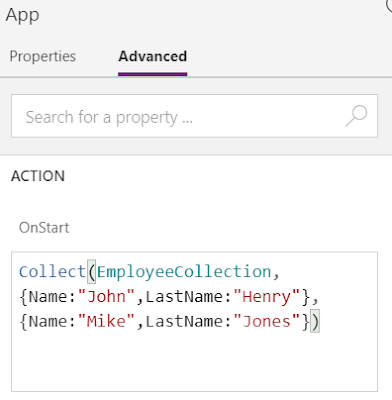
Collect(EmployeeCollection, {Name:"John",LastName:"Henry"},   {Name:"Mike",LastName:"Jones"})

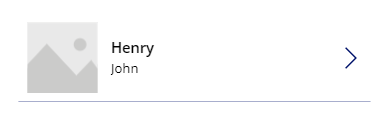
If we put this code on App Start, the code will run each time when the app loads. I have configured this as a Data Source to the Gallery to show the data and here is the result.
Now close the app and reload it so that the app start code runs. The gallery will now show the items in the EmployeeCollection.

Syntax for both collect and clearcollect is similar but the only difference is ClearCollect function deletes all the records from a collection. And then adds a different set of records to the same collection. With a single function, ClearCollect offers the combination of Clear and then Collect.

For example, we did set the StudentCollection in the AppStart and if we put the below command in OnVisible property of the Screen, the collection would be modified and output would be as below.

ClearCollect(EmployeeCollection,   {Name:"John",LastName:"Henry"} )

Where do we see these collections while developing?

To see the items in the collection go to the menu and select ‘File’. Now select ‘Collections’. When we use the PowerApps add record to collection functionality we can see the results instantly. 

If you want clear the collection, we can use Clear function.

Clear(EmployeeCollection);

Hope this helps.

--
Happy 365'ing
Gopinath

Monday, 15 June 2020

Text Control in PowerApps

Hi Everyone,

It's all about Text Control in PowerApps (Canvas App) today. As we all know, Text is a string. Below are main properties or events which we have to remember

• OnChange  - When the state of the control changes
• OnSelect  - When the taps the control
• Visible Property - By definition, it takes bool. True  - It shows the field on the form and we can use this property to show and hide the field. 
• Default Property - Show the text the default text. Sometimes, you might get a requirement to put some text as a default text.
• Hint Text Property - This is initially greyed out and when the users taps on, it changes the control to input. I feel this is a nice one as we can put the right text and that will make users understand what exactly they have to do.
• Mode - Single or Multiline.
• Format Property - format the text Number.
• Clear - Clear shows Cross mark on the Text and user can easily clear the data.

Hope this helps.

--
Happy 365'ing
Gopinath

Thursday, 11 June 2020

Create Record in Dynamics 365 CE Using Power Apps and Power Automate (Flow)


Hi Everyone,

This is my first post on Power Apps (Canvas App) and could be very basic to most of the people but it would helpful for the beginners like me.

  • Login to Make.PowerApps.Com
  • We can directly create an App and Flows from the navigation as below but I would recommend to create a Solution first and then create App and Flow in that.
  • Create a solution with the name as you wish and select the right publisher.
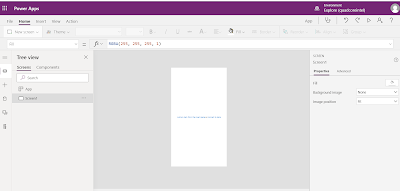
  • Open the solution and click on New from Top Navigation  --> App  --> Canvas App  --> Phone form factor(I have selected for it Phone UI for this post, you can select as per your requirement)
  • Save the App first with desired name. You can use Ctrl+S as a shortcut.
  • You will get the new tab in the browser as below.
  • From Insert Menu add required text boxes, labels and a button on the Screen. Make sure you use good naming convention as a best practice.
  • Go back to the solution again and create a flow as below.
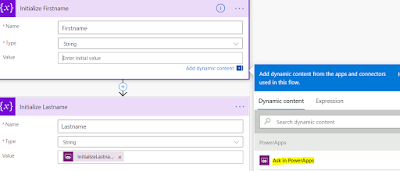
  • Take trigger as PowerApps.
  • Declare two variables and set them to get the value from Power App. We have "Ask In Power Apps" in the value for getting the parameters.
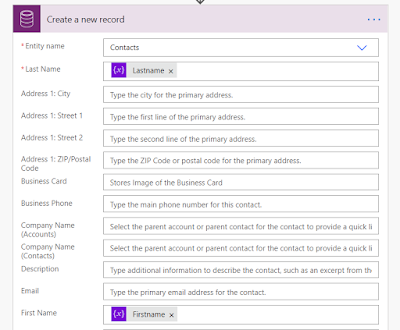
  • Add a step to create a contact in Dynamics 365 CE using Common Data Service Connector and set the values. We cannot use Common Data Service Current Environment Connector as there is an OOB issue with that. Check this for more information on that.
  • Add "Respond to PowerApp or flow" and select response which you would like to send. Here I have selected Text and gave the response as below.
  • Let's go back to our canvas app and click on Action on top  --> Power Automate.
  • It will show the Flows that you have in the Organization and select the flow the one which you have created.
  • Call below OnSelect of the Create Contact button.

Set(flowResponse, NewContactCreatingFromFlow.Run(TextFirstname.Text, TextLastname.Text)); Notify(flowResponse.message,NotificationType.Success, 3000);

The code is simple, we are calling the flow with the parameters and storing the response in a variable called flowResponse. After the execution of flow is completed, we are notifying the user with the response that we got from Flow and for this we are using Notify command.

And Let's run it..


Hope this helps.

--
Happy 365'ing
Gopinath