Wednesday, 29 March 2017

Identify Users with No Valid CRM Security Role

Hi,

The tedious work we do when a Dynamics CRM Implementation goes live is getting the users on board with CRM. For this, CRM Admins must ensure that all users must have a security role to log in without any issue.  When we have hundreds of users and there is a possibility that some users may get missed.

To identify the users with no security roles, CRM has a view i.e Users with no asassigned security role. This view gives the users who have a valid license but do not any security role.

Hope this helps.
--
Happy CRM'ing
Gopinath

Monday, 6 March 2017

Rollup view for activities with Dynamics CRM/365

In Dynamics 365, a new feature "Rollup View" relation behavior has been introduced. Before going in detail of this, let's understand Related Regarding Records view.

Related Regarding View - This is a special filter which automatically did a rollup of all activities associated with account/contact. It shows the activities from below conditions.

Activity associated with a child account or contact of the selected record.
Child Account or contact in the To/From (Activity party) of the activity.
Activity has the regarding set to an Opportunity, Quote, Order, Invoice, Case and Contract, a limited list of OOB entities.

If you created a custom entity that was parented by the Account or Contact and had activities created against this custom entity, they would not be displayed on the Account or Contact activities view even with the Related Regarding filter enabled.

This problem is solved by "Rollup view" feature in Dynamics 365. With this setting, we can now see the activities related to custom entities roll up to the account/contact. This is enabled only for Account and Contacts for now.

Here is the example for the same.

I have created a custom entity called Program which 1:N relationship with Account entity.
Open the Relationship and check the Relationship Behavior. You will a see setting as Roll View. Set it to Cascade All.
Create a Program record under Active Transport Inc. account and create an activity under it.
Now, navigate to "Active Transport Inc." account record and then to Activities Associated View. You will see the activity of the child records in this view.

The Rollup View flag can only be set if the following conditions are met:
  • The primary and the related entity must be a 1:N (one-to-many) or N:1 (many-to-one) custom relationship. The flag can’t be set on any out-of-the-box system relationships.
  • The primary entity for the relationship must be Account, Contact, or Opportunity. This is because these are the only entity forms in the system where the Activity Associated View appears. You can’t specify any other primary entity for activity rollups.
  • The related entity must support Activities.
Hope this helps.

--
Happy CRM'ing
Gopinath

Sunday, 5 March 2017

Lightweight Outlook App for Dynamics 365

Dynamics 365 App for Outlook isn’t the same thing as Dynamics 365 for Outlook. 

Microsoft Dynamics 365 App for Outlook paired with server-side synchronization is the preferred way to integrate Microsoft Dynamics 365 with Outlook. Note that tracking activities is not supported when Dynamics 365 App for Outlook and Dynamics 365 for Outlook are used together by the same user. 

System Administrators can push the app to the user's outlook from CRM.

How to push the app the users.
  • Go to Settings > Dynamics 365 App for Outlook. 
  • In the Getting Started with Dynamics 365 App for Outlook screen, under Add for Eligible Users (you may have to click Settings if you’re opening this screen for the second or subsequent time)
  • select the Automatically add the app to Outlook check box if you want to have users get the app automatically.  If a user has the required privileges and email is synchronized through server-side synchronization, you won’t have to do anything more to push the app to them
  • To push the app to all eligible users, click Add App for All Eligible Users.
  • To push the app to certain users, select those users in the list, and then click Add App to Outlook.
If the list shows that a user is pending or hasn’t been added, you can click the Learn more link next to the user to find more information about status.
When you’re done, click Save.

Users can install App themselves by following the below two steps if the Server Side Sync is configured.
  • Users can click the Settings button and then click Apps for Dynamics 365.
  • In the Apps for Dynamics 365 screen, under Dynamics 365 App for Outlook, users click Add app to Outlook.
After few mins, users can see a Add-In on their outlook


Hope this helps.

--
Happy CRM'ing
Gopinath

Monday, 20 February 2017

Feedback And Rating in Dynamics CRM/365

Hi,

A new entity called "Feedback" has been introduced in Dynamics CRM 2016 Update 1. The purpose of adding this entity is to provide the feedback and rating for particular entity in CRM. This is useful for the organizations for tracking the feedback for the product they are selling, or support/services that they are providing to the customers. This Feedback and Rating in Dynamics CRM 2016 helps to improve the product’s quality or customer experience with your organization.
Let us see how we can use this entity.

For using this users must have Read, Create and Update privileges for this entity.


How to Enable and Use?

A new Option "Feedback" is shown on the Entity Information under General tab. Enable it for the Entities where you wanted to use.

You can enable feedback on entities to allow customers to write feedback for any entity record, or rate the entity records within a range of allowed ratings. 

By default, feedback is enabled for the Knowledge Article entity and the rollup field is added to Knowledge Article entity.

Once you enable Feedback on the entity, you will that in the Related Entites.


Title: A short title for the Feedback, specifying parameter for response.
Regarding: The Feedback created for the entity.
Source: Here you can select two options, Internal or Portal. For example, if you are capturing the Feedback from within the CRM i.e. through phone or email then you can select Source as Internal. In addition, you can add more options to this field as per your requirement.
Comments: Comments for the Feedback being created.
Rating: A number to specify how useful the product is.
Minimum Rating and Maximum Rating: Define the minimum and maximum rating numbers for the rating scale. For example, in our case, we are using the rating scale as 1-10, then minimum rating as 1 and maximum rating as 10 can be provided.
Normalized Rating: The value for this field is auto calculated, as this is the calculated field. The calculation is done based on the below formula.
Normalized Rating = (Rating – Minimum Rating)/ (Maximum Rating – Minimum Rating)
However, you can change the calculation for the Normalized Rating by changing the formula for this field from Customizations.
Created By (Contact): It is the customer contact on behalf of whom you are creating a feedback.
Closed By: This field gets automatically populated with the user who deactivates the Feedback record.
Closed On: This field gets auto populated with the date and time when the user deactivates the Feedback record.

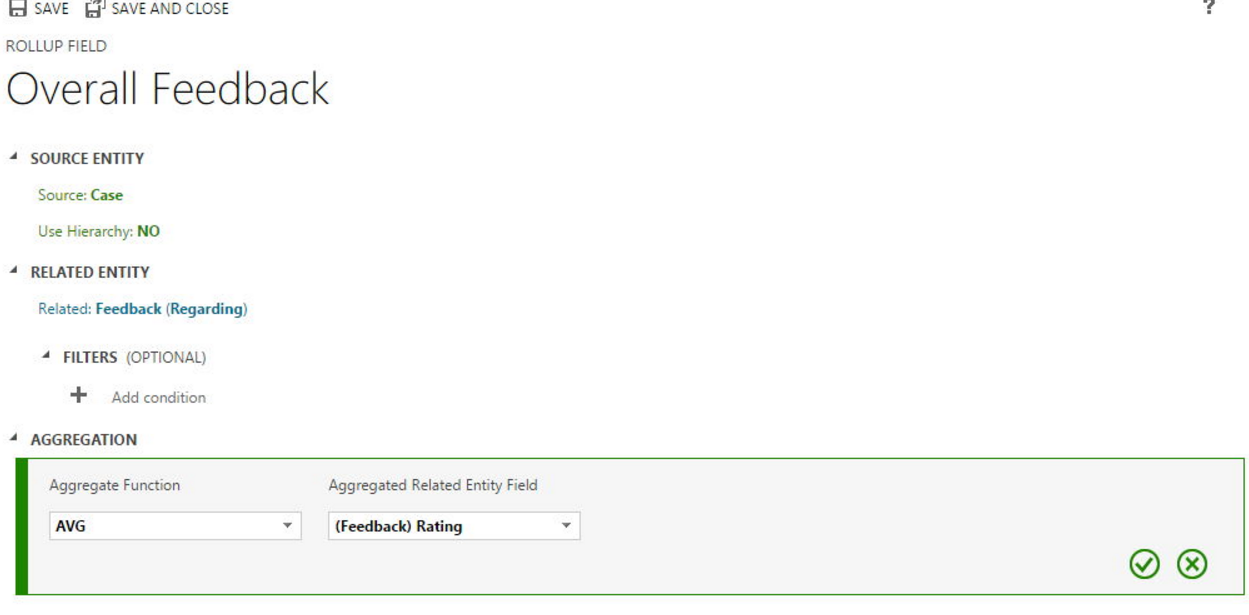
In case, if we have multiple ratings against one particular record, with use of simple rollup field the ratings can be consolidated.

Hope this helps.

--
Happy CRM'ing
Gopinath

Wednesday, 15 February 2017

Debug CRM for Mobiles/Tablets from a PC browser

Hi, 

Recently, I have started working on Dynamics 365 Mobile App. We have found that Scripts that works in browser on a PC is not working on the Mobile and giving error messages. This is really frustrating as we don't have debugging facility on the Mobile App..

After some search, I came to know that we can open CRM for Tablets user interaface in a Web Browser. Here is the URL for it.

Before using the URL, make sure that you login to CRM using required credentials and in another table enter the following.

https://orgname.crm.dynamics.com/nga/main.htm?org=orgname&server=https://orgname.crm.dynamics.com

Replace “orgname” with your CRM organization name. That's it when you hit the URL in browser, you will see the screen which is shown on mobile and once it is done with configuring use your browser's developer tools to debug.

Hope this helps.

--
Happy CRM'ing
Gopinath

Sunday, 29 January 2017

New Sort Date DateTime attribute added in Activity Entity in Dynamics 365

Hi,

A new Sort Date attribute of type Date Time has been added to Activity Entity which means to all the Activities (Task, Phone call, Letter, Fax, Email and etc.).

By default the value is NULL, we have to populate it through Business Rule, Plugin or any other method. The basic use could be to use it for sorting apart from OOB Modified on and Created on in View, Report, Chart as well as in Social Pane.


The good part of this is, the field is available for the Custom Activities too.

Hope this helps.

--
Happy CRM'ing
Gopinath

Non-Interactive Users in Dynamics CRM Online

Hi,

A non-interactive user is a user account in Microsoft Dynamics CRM Online that will only be used for programmatic access to CRM (using the web services layer) such as as for integration with an ERP system or other LOB systems  without requiring a Microsoft Dynamics 365 (online) license. For each instance of Microsoft Dynamics 365 (online), you can create up to five non-interactive user accounts.

Here are the setps to create non-interative user in Dynamics CRM Online.
  • Create a user account in the Office 365 admin center.
  • Be sure to assign a Dynamics 365 (online) license to the account.
  • Go to Dynamics 365 (online).
  • Go to Settings > Security.
  • Choose Users > Enabled Users, and then click or tap a user’s full name.
  • In the user form, scroll down to the Client Access License (CAL) Information section and select Non-interactive for Access Mode.
  • You then need to remove the Dynamics 365 (online) license from the account.
  • Go to the Office 365 admin center.
  • Click Users > Active Users.
  • Choose the non-interactive user account and in the right-side menu under Product licenses, click Edit.
  • Turn off the Dynamics 365 (online) license and click Save.
  • Go back to Dynamics 365 (online) and confirm that the non-interactive user account Access Mode is still set for Non-interactive.

Hope this helps.

--
Happy CRM'ing
Gopinath

Wednesday, 18 January 2017

How to Uninstall App from Windows 10

Hi,

Here are steps to uninstall app from Windows 10

1) Open the Start Menu
2) Search for Settings
3) Click on System on the Settings menu

4) Select Apps & features

5) List of installed apps are shown. You can search for app and Click on Uninstall button to uninstall the app.


Hope this helps.

--
Thanks
Gopinath

Dynamics CRM Mobile App OOB Limitations

Hi,

Today I have started working on the CRM for Phones and grabbed the limitations before starting the actual work.

Here are some limitations which need to considered while designing.

• Default values for out of the box fields do not get populated. Ex: Status, recommendation is to hide these fields on create form.
• Out of the box related records filtering does not work in the mobile client. Explicit JavaScript has to be written to support it. We have a workaround for this. 
• The default create form is the quick create form for the entity. So the quick create form needs to be disabled for the entity to display the complete create form according to the requirement.
• Lookups in mobile client always take the default lookup view for the entity even if a different view is configured for the lookup field from the form. So in case any filters are applied to the default lookup view this will apply to the lookup in the mobile client.
• Out of the box duplicate detection rules also do not work in the mobile clients.
• Quick view forms are not supported
• The create form experience is restricted to roughly occupy only one third of the screen size. So try avoiding having multiple fields on create form for better user experience.
• A tab always takes up its own space on the edit form even if there is nothing inside it. We might have a tab with 2 sections, each containing a sub grid on the web form. On the mobile form, it renders as a white box for the tab followed by the 2 grids. Refer the below screenshot to see how most of the space in the tab is unused in the mobile client when it contains mostly sub-grids.

Hope this helps.

--
Happy CRM'ing
Gopinath

Sunday, 1 January 2017

Turn On/Off Learning Path in Dynamics 365

Hi,

We all know that Learning Path is the new thing introduced in CRM. 

Here is a way to Turn On/Off.

Go to Settings > Administration..

On the Administration page, click System Settings.

On the General tab, scroll down to the Set custom Help URL section. Next to Enable Learning Path, select Yes or No. 

Hope this helps.

--
Happy CRM'ing
Gopinath

Saturday, 31 December 2016

Enable for Tablet is Disabled in Dynamics 365

Hi,

Today I was working on the Dynamics 365 app. We have a webresource on form which we wanted to show on the tablet. When I checked to enable it, we observed that the Checkbox was disabled.

After some search came to know, it was disabled at Web Resource level. 

Open the Web Resource from the Customization and you will see a check box for Enabling. First we need to Enable at the Web Resouce Level and then the Check Box will get Enabled on the Web Resource Properties of the Form.
Hope this helps.

--
Happy CRM'ing
Gopinath

Wednesday, 14 December 2016

Add custom icons with tooltip for a column

You can add custom icon with tooltip text to display in a column depending on the column value; you can also specify localized tooltip text. This can be done by adding the custom icons as image web resources in your Dynamics 365 instance and then using a JavaScript web resource to add JavaScript code for a column to display the icons depending on the column value.

Here is the way to do it.

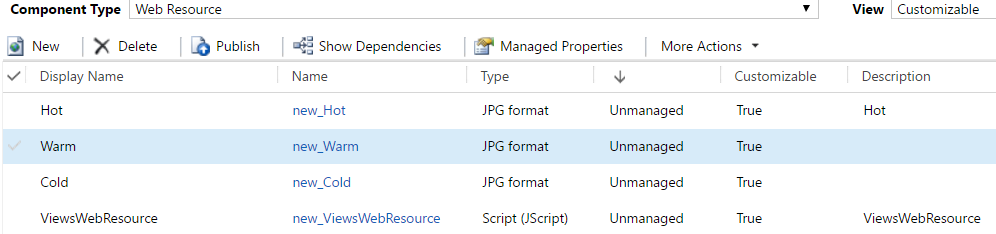
1) Create a required webresources as Images in CRM (In this example, I have created three images)


2) Create a JavaScript Webresource and add the following the code to it. Make sure you have given proper webresource names in the Switch part of the JavaScript code.
function displayIconTooltip(rowData, userLCID) {   
    var str = JSON.parse(rowData);
    var coldata = str.opportunityratingcode_Value;
    var imgName = "";
    var tooltip = "";
    switch (coldata) {
        case 1:
            imgName = "new_Hot";
            switch (userLCID) {
                case 1036:
                    tooltip = "French: Opportunity is Hot";
                    break;
                default:
                    tooltip = "Opportunity is Hot";
                    break;
            }
            break;
        case 2:
            imgName = "new_Warm";
            switch (userLCID) {
                case 1036:
                    tooltip = "French: Opportunity is Warm";
                    break;
                default:
                    tooltip = "Opportunity is Warm";
                    break;
            }
            break;
        case 3:
            imgName = "new_Cold";
            switch (userLCID) {
                case 1036:
                    tooltip = "French: Opportunity is Cold";
                    break;
                default:
                    tooltip = "Opportunity is Cold";
                    break;
            }
            break;
        default:
            imgName = "";
            tooltip = "";
            break;
    }
    var resultarray = [imgName, tooltip];
    return resultarray;
}


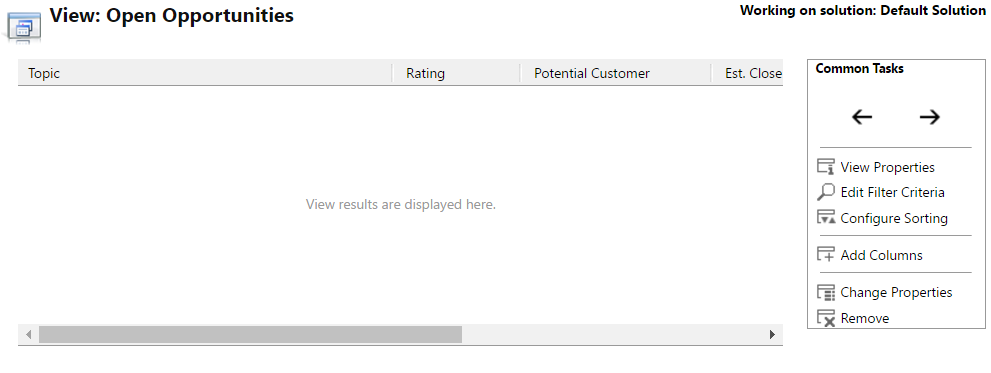
3) Navigate to Customizations --> Entity (Ex: Opportunity) --> Views --> Select the view where you want to add the image.
4) Select the column where you want to add the Image/Tooltip and select on Change Properties. You will see an to select Webresource file and Function name to call it. Select the webresource which you have created and given the functionname as below.

5) Save and Close the View and publish the customizations.

Here is the Output of it.

Hope this helps.

--
Happy CRM'ing
Gopinath

Sunday, 4 December 2016

Limitations of Voice of the Customer in Dynamics CRM

Hi,

Here are the limitations of Voice of the Customer in Dynamics CRM.

Voice of the Customer for Microsoft Dynamics 365 has the following limitations designed to optimize performance:
  • You can publish a maximum of 200 surveys.
  • You can include a maximum of 250 questions on a survey. If you've enabled feedback for a survey, you can include a maximum of 40 questions.
  • You can create a maximum of 25 pages per survey.
  • You can send a maximum of 10,000 email invitations that include piped data in a 24-hour period. Any emails that exceed that amount will remain pending during that time and will automatically start sending when the time limit is over.
  • Voice of the Customer for Microsoft Dynamics 365 will pull a maximum of 2,400 survey responses per day.
  • Voice of the Customer for Microsoft Dynamics 365 allows storage of a maximum of 1,000,000 survey responses.
Hope this helps.
--
Happy CRM'ing
Gopinath


Voice of the Customer in Dynamics CRM

Voice of the customer is a new Dynamics CRM 2016 feature that was introduced to capture feedback regarding the business products or service from CRM. With Voice of the customer we can easily set up Surveys in Dynamics CRM and use the responses for the business growth.

Here are the steps for installing Voice of the Customer in CRM.

1. Sign in to https://portal.office.com with your Global administrator or Dynamics 365 System Administrator credentials. 
2. Click Admin centers > Dynamics 365
3. Click the Instances tab, and then select the instance to add the solution to.
4. Click Solutions.
5. Select the Voice of the Customer and click Install. Proceed through Terms of service to accept the terms.
The status for the solution changes to Installation pending.
The status for the solution will change to Installed when the solution is ready.

After you've installed the Voice of the Customer for Microsoft Dynamics 365 preferred solution, you need to accept the terms and conditions to configure it in Dynamics 365.

1. Go to Settings > Customizations.
2. Click Solutions.
3. In the list of available solutions, select Voice of the Customer for Microsoft Dynamics 365.
4. In the Voice of the Customer for Microsoft Dynamics 365 Configuration screen, select I agree to the terms and conditions and click Enable Voice of the Customer for Microsoft Dynamics 365.

When the configuration completes, you can start using Voice of the Customer for Microsoft Dynamics 365 surveys.

Once configuration is success, you will see a Voice of the Customer added to your CRM Ribbon in Site Map
To create new survey record, navigate to Voice of the Customer --> Survey and create new record.
There are 3 forms on the Survey Record
1) Survey
2) Designer
3) Dashboard
Survey
This form has all themes, behavior controls as well as question/response configuration and users can modify these as required.

Designer
This page allows you to design UI for the survey. It provides options to pages, questions and ratings etc.
Users can design Welcome Page which will shown on opening the survey.

After this users can add question via the drag and drop editor. Users can double click on the form for more editing options.

Dashboard
Dashboard shows the statistical information by submission of feedback with invitation link which is generated in Survey activity (Will come to about this in few seconds)

Publish the Survey Record.

Open any contact/account in CRM and in the Social Pane you will an activity with name as Survey Activity.
Fill all related fields data of Survey activity and click on Save. Once save, the system will generated the survey invitation link that can be sent to the user for providing feedback.

Users can provide feedback by opening the link.


In CRM, users can find the Survey Response by navigating to the Survey Response entity within Dynamics CRM or from the related Survey Response for Survey Activity.
Hope this helps.

--
Happy CRM'ing
Gopinath