Showing posts with label D365 CE. Show all posts

Tuesday, 21 April 2020

Xrm.Navigation.openForm - Open the record with specific Business Process Flow

Hi Everyone,

Today I got some strange requirement that to open the record by setting up to specific Business Process Flow on UI when clicked on the lookup from the child form.

We need to understand multiple new things from doing this.

1) addOnLookupTagClick event - Refer this to understand more about. By this event, we can prevent the default behavior of the click event on lookup.
2) OpenForm - As we all know that we have to use Xrm.Navigation.openForm for opening the records and fortunately we can pass the ProcessId and ProcessInstanceId in the entityFormOptions. In case, if you want to open the record in a specific stage, We have pass stageID.

Here is the piece of code for the same and I have called this code on the load event.

function onLoadOfOpportunity(executionContext) {
    var formContext = executionContext.getFormContext();
    formContext.getControl('new_parentopportunity').addOnLookupTagClick(function (e) {
        e.getEventArgs().preventDefault(); // disables the default behaviour of opening the record
        // Get the lookup record 
        var lookupRecord = e.getEventArgs().getTagValue();
        // Xrm.Navigation.openForm(entityFormOptions, formParameters).then(successCallback, errorCallback);
        var entityFormOptions = {};
        entityFormOptions["entityName"] = "opportunity";
        entityFormOptions["entityId"] = lookupRecord.id;
        entityFormOptions["processId"] = "EC985A4F-E5E2-489F-A13D-4AFBECD6A769";
        entityFormOptions["processInstanceId"] = "F532CF05-8B83-EA11-A811-000D3A3E14C7";
        // Open the form.
        Xrm.Navigation.openForm(entityFormOptions).then(
            function (success) {
                console.log(success);
            },
            function (error) {
                console.log(error);
            });
    });

}

When I open the record from the HomePage grid. You see the process as "Opportunity Sales Process".

The same record if open from the lookup, you see "Second Business Process Flow"


Hope this helps.

--
Happy 365'ing
Gopinath

Monday, 2 December 2019

Calling Flow (Power Automate) from PowerApps - Dynamics 365 CE

Hi Everyone,

In this article, I am going to create a simple Power APP and call a Flow from  it.

Login to your Power Apps environment - https://us.create.powerapps.com/studio/
Select Blank App -> Phone Layout.

Arrange the required Labels, Text Fields and Buttons.

Select Action as shown in the below and click on Flows --> New --> Instant -- From blank.

It will open the below screen and select PowerApps as a trigger.

In the next Select, Search for Common Data Service and select "Common Data Service"
and then in the Actions select Create a new record.

Select the Required entity.

Click on Last Name field and select on Ask in PowerApps to generate a Parameter.

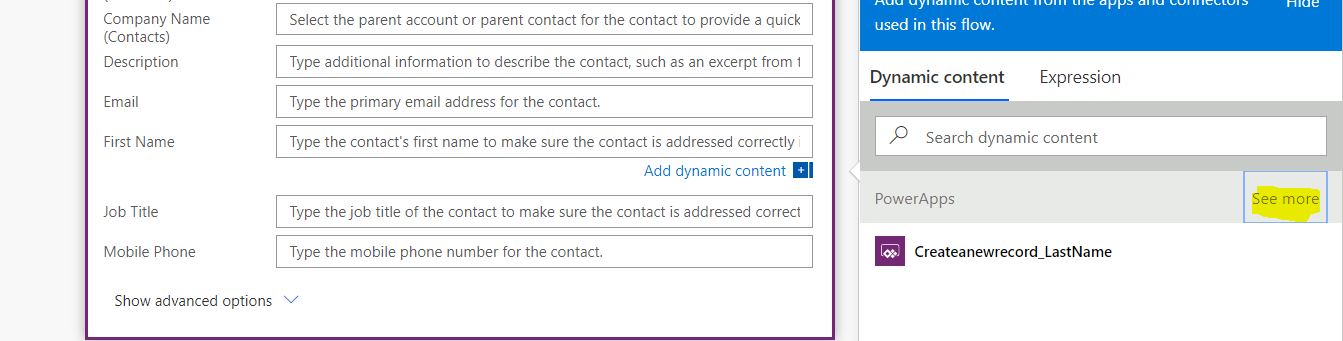
Select other fields and select on Ask in PowerApps (If you don't see Ask in PowerApps, click on See more)

Save the Step and click on New Step as "Respond to a PowerApp or flow"

Click on Add Output and select Text.

Give the Title and select Value as Contact Unique Identifier.

Give the good name to understand the functionality.

Save the flow and move to PowerApps screen.

Select the button on the screen and Click on Flows from Action on the top menu. It shows the flow that was created. Once you select the flow, it shows as Adding.

We have to update the formulate to send the field's value to the flow as below.

The above works things works fine to hit Flow but as we need to capture the Output of it, we have to change it the Formula as below.
"Set(varContactID, power.Run(TextInput1.Text, TextInput2.Text).contactid);"


Select the label on which we have to show the value and set the Variable that is used to store the output from flow on the button click.

Run and test it.


Hope this helps.

--
Happy 365'ing
Gopinath

Monday, 25 November 2019

Modal Popups in CE - Xrm.Navigation.navigateTo - Dynamics 365 CE

Hi Everyone,

Today I was browsing something and came to know that one of the awaiting feature from many years has been released.

Many times we get the requirement to open something in Modal Popup and we all know that was no way to do that. We have that know OOB.

We just have to use the below code for it. 


var pageInput = { pageType: "webresource", webresourceName: "WebResourceName" };
var navigationOptions = {
    target: 2,
    width: 400,
    height: 300,
    position: 1
};
Xrm.Navigation.navigateTo(pageInput, navigationOptions).then(
    function success() {
        // Handle dialog closed
    },
    function error() {
        // Handle errors
    }
);

Along with this, we can use NavigateTo to navigate to Dashboards, Views. Use PageInput as below for the same.

  // Navigates to the Entities Default View.
    var pageInput = { pageType: "entitylist", entityName: "contact", viewId:"3a282da1-5d90-e011-95ae-00155d9cfa02" };
    // Navigates to the View that is mentioned in the ViewID.
    var pageInput = { pageType: "entitylist", entityName: "contact", viewId:"3a282da1-5d90-e011-95ae-00155d9cfa02" };
    // Navigages to the specified Dashobard
    var pageInput = { pageType: "dashboard", dashboardId: "45f88f83-0e67-443b-bd05-81d49719f6b1" };


Link from Microsoft Docs


Hope this helps.

--
Happy 365'ing
Gopinath

Monday, 11 November 2019

Show button only when the record is selected - Selection Count Rule

Hi Everyone,

Today I was working on adding some button on the Subgrid and the requirement was to show the button when at least single record is selected.

We can easily achieve this using a Enable Rule - Selection Count Rule. Here is the enable rule of the same, we just have to attach this rule to the button command.


      <EnableRule Id="...SelectionCount.EnableRule">
        <SelectionCountRule AppliesTo="PrimaryEntity" Minimum="1" Default="false" />
      </EnableRule>

Hope this helps.

--
Happy 365'ing
Gopinath

Thursday, 31 October 2019

Hide links from Primary Navigation in Dynamics 365 Portals

Hi,

Many times, we get the requirement to hide the links in the Primary Navigation of the Portal to the anonymous users.

To get this done, we have to create Web Page Control Rule

Navigate to Portals -> Web Page Access Control Rules -> New

Give the name and select the Website and WebPage that has to hidden.
Right - Select Restrict Read and Save the record.
After saving, go to Web Roles tab and add Authenticated Users web role to it.

Authenticated User
Anonymous User


Hope this helps.

--
Happy 365'ing
Gopinath

Tuesday, 29 October 2019

Add a custom button on Web Page - Dynamics 365 CE Portals

Hi,

Today when I was working on Portals, I got a requirement to add a cancel button beside Submit button on EntityForm and user has to navigate back to EntityList when click on it.

We can quickly do this by adding some script on the WebPage. Open the required WebPage and there is a tab named as Advanced and add the below code. I have used SiteMarkers to navigate. 


$(document).ready(function () {
    $('#InsertButton').after('<button id="cancelbutton" type="button" class="btn btn-primary button" style="margin-left:10px;"><span></span>Cancel</button>');
    $("#cancelbutton").click(function () {
        window.location.href = "{{ sitemarkers['ML_CustomEntityList'].url }}";
    });

});

Make sure you add the same piece of code in all Content Pages. 

Hope this helps.

--
Happy 365'ing
Gopinath

What are Site Markers in Dynamics 365 CE Portal?

Hi,

I was searching something on Portals and reached on Site Markers. Some how I felt that Site Markers are not used much in the Development of Portals. 

Many times we get a requirement to navigate to multiple places on click of buttons and we use Window.location and use the direct URLs or may be we some hyperlinks on Portal and we directly give the URL of the Web Page which works good until someone changes the Partial URL on the Web Page.

Site Markers are something which are designed for this. We have to create Site Markers and link the Web Page that is need and use Site Marker Name in the code to navigate. Here is the syntax for the same.

{ { sitemarkers["SitemarkerName"].url } }

Changing the name of the Sitemarker is strictly prohibited. This way, we don't face any issues even if the Partial URL on Web Page has changed. 

Hope this helps.

--
Happy 365'ing
Gopinath

Retrieve Dynamics 365 CE data in Portal by using Odata Feed using JavaScript

Hi,

Today I have some requirement to get some data from CE and show it on the UI. We can do it very easily by doing a OData call. 

Here are the steps to be followed for the same. 

1) Create an EntityList with the required entity. Make sure you select the view, Enable Entity Permissions (if you uncheck this, you will see 500 Error as you don't have the permission to view the data).

2) Navigate to OData Feed tab and enable it. EntityTypeName and EntitySetName are textboxes, you can give as per your wish and then select the view.

3) Hit the browser with your portal URL and "/_odata"
   https://abc.microsoftportals/_odata
4) You will see the list of entities on which Odata feed is enabled.
5) Now you can hit browser with the name that was given and you can see the results. https://abc.microsoftportals/_odata/ContactSet

In case if you are not seeing the results, please check Entity Permissions and give the right permissions.

6) You can use below code by passing OdataURL and it will get the results for you.


function getResponse(oDataUrl) {
    var response = null;
    $.ajax({
        type: "GET",
        url: oDataUrl,
        dataType: "json",
        async: false
    }).done(function (json) {
        response = json.value;
    });
    return response;
}

Hope this helps.

--
Happy 365'ing.
Gopinath