Saturday 31 December 2016

Enable for Tablet is Disabled in Dynamics 365

Hi,

Today I was working on the Dynamics 365 app. We have a webresource on form which we wanted to show on the tablet. When I checked to enable it, we observed that the Checkbox was disabled.

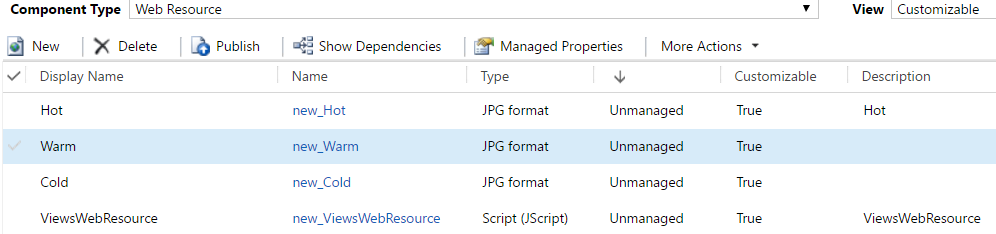
After some search came to know, it was disabled at Web Resource level. 

Open the Web Resource from the Customization and you will see a check box for Enabling. First we need to Enable at the Web Resouce Level and then the Check Box will get Enabled on the Web Resource Properties of the Form.
Hope this helps.

--
Happy CRM'ing
Gopinath

Wednesday 14 December 2016

Add custom icons with tooltip for a column

You can add custom icon with tooltip text to display in a column depending on the column value; you can also specify localized tooltip text. This can be done by adding the custom icons as image web resources in your Dynamics 365 instance and then using a JavaScript web resource to add JavaScript code for a column to display the icons depending on the column value.

Here is the way to do it.

1) Create a required webresources as Images in CRM (In this example, I have created three images)


2) Create a JavaScript Webresource and add the following the code to it. Make sure you have given proper webresource names in the Switch part of the JavaScript code.
function displayIconTooltip(rowData, userLCID) {   
    var str = JSON.parse(rowData);
    var coldata = str.opportunityratingcode_Value;
    var imgName = "";
    var tooltip = "";
    switch (coldata) {
        case 1:
            imgName = "new_Hot";
            switch (userLCID) {
                case 1036:
                    tooltip = "French: Opportunity is Hot";
                    break;
                default:
                    tooltip = "Opportunity is Hot";
                    break;
            }
            break;
        case 2:
            imgName = "new_Warm";
            switch (userLCID) {
                case 1036:
                    tooltip = "French: Opportunity is Warm";
                    break;
                default:
                    tooltip = "Opportunity is Warm";
                    break;
            }
            break;
        case 3:
            imgName = "new_Cold";
            switch (userLCID) {
                case 1036:
                    tooltip = "French: Opportunity is Cold";
                    break;
                default:
                    tooltip = "Opportunity is Cold";
                    break;
            }
            break;
        default:
            imgName = "";
            tooltip = "";
            break;
    }
    var resultarray = [imgName, tooltip];
    return resultarray;
}


3) Navigate to Customizations --> Entity (Ex: Opportunity) --> Views --> Select the view where you want to add the image.
4) Select the column where you want to add the Image/Tooltip and select on Change Properties. You will see an to select Webresource file and Function name to call it. Select the webresource which you have created and given the functionname as below.

5) Save and Close the View and publish the customizations.

Here is the Output of it.

Hope this helps.

--
Happy CRM'ing
Gopinath

Sunday 4 December 2016

Limitations of Voice of the Customer in Dynamics CRM

Hi,

Here are the limitations of Voice of the Customer in Dynamics CRM.

Voice of the Customer for Microsoft Dynamics 365 has the following limitations designed to optimize performance:
  • You can publish a maximum of 200 surveys.
  • You can include a maximum of 250 questions on a survey. If you've enabled feedback for a survey, you can include a maximum of 40 questions.
  • You can create a maximum of 25 pages per survey.
  • You can send a maximum of 10,000 email invitations that include piped data in a 24-hour period. Any emails that exceed that amount will remain pending during that time and will automatically start sending when the time limit is over.
  • Voice of the Customer for Microsoft Dynamics 365 will pull a maximum of 2,400 survey responses per day.
  • Voice of the Customer for Microsoft Dynamics 365 allows storage of a maximum of 1,000,000 survey responses.
Hope this helps.
--
Happy CRM'ing
Gopinath


Voice of the Customer in Dynamics CRM

Voice of the customer is a new Dynamics CRM 2016 feature that was introduced to capture feedback regarding the business products or service from CRM. With Voice of the customer we can easily set up Surveys in Dynamics CRM and use the responses for the business growth.

Here are the steps for installing Voice of the Customer in CRM.

1. Sign in to https://portal.office.com with your Global administrator or Dynamics 365 System Administrator credentials. 
2. Click Admin centers > Dynamics 365
3. Click the Instances tab, and then select the instance to add the solution to.
4. Click Solutions.
5. Select the Voice of the Customer and click Install. Proceed through Terms of service to accept the terms.
The status for the solution changes to Installation pending.
The status for the solution will change to Installed when the solution is ready.

After you've installed the Voice of the Customer for Microsoft Dynamics 365 preferred solution, you need to accept the terms and conditions to configure it in Dynamics 365.

1. Go to Settings > Customizations.
2. Click Solutions.
3. In the list of available solutions, select Voice of the Customer for Microsoft Dynamics 365.
4. In the Voice of the Customer for Microsoft Dynamics 365 Configuration screen, select I agree to the terms and conditions and click Enable Voice of the Customer for Microsoft Dynamics 365.

When the configuration completes, you can start using Voice of the Customer for Microsoft Dynamics 365 surveys.

Once configuration is success, you will see a Voice of the Customer added to your CRM Ribbon in Site Map
To create new survey record, navigate to Voice of the Customer --> Survey and create new record.
There are 3 forms on the Survey Record
1) Survey
2) Designer
3) Dashboard
Survey
This form has all themes, behavior controls as well as question/response configuration and users can modify these as required.

Designer
This page allows you to design UI for the survey. It provides options to pages, questions and ratings etc.
Users can design Welcome Page which will shown on opening the survey.

After this users can add question via the drag and drop editor. Users can double click on the form for more editing options.

Dashboard
Dashboard shows the statistical information by submission of feedback with invitation link which is generated in Survey activity (Will come to about this in few seconds)

Publish the Survey Record.

Open any contact/account in CRM and in the Social Pane you will an activity with name as Survey Activity.
Fill all related fields data of Survey activity and click on Save. Once save, the system will generated the survey invitation link that can be sent to the user for providing feedback.

Users can provide feedback by opening the link.


In CRM, users can find the Survey Response by navigating to the Survey Response entity within Dynamics CRM or from the related Survey Response for Survey Activity.
Hope this helps.

--
Happy CRM'ing
Gopinath

Saturday 3 December 2016

Get the list of all the dirty fields in the form in Dynamics 365

Hi,

Recently on opening our lead record in CRM we were getting unsaved changes message. We know this is because of the some of Business Rules or JavaScript and it is bit difficult to find the field.

Here is the way to quickly find the list of all field those are dirty.

1) Open the record in CRM.
2) Navigate to Developer Tools.
3) Go to -> Console and paste the below code and press Enter.

var message = "The following fields are dirty: \n";
frames[0].Xrm.Page.data.entity.attributes.forEach
    (function (attribute, index) {
        if (attribute.getIsDirty() == true) {
            message += "\u2219 " + attribute.getName() + "\n";
        }
    });

alert(message);

You will the field schema names in the alert.

Hope this helps.

--
Happy CRM'ing
Gopinath

Disable OOB Pricing in CRM - Calculate Price - OOBPriceCalculationEnabled in Dynamics CRM

Hi,

In some projects, we might not use the standard set of pricing and calculation which are OOB by setting the Price Lists and we all know that system requires Price List as a required value on the Quote, Opportunity etc.. for adding products else it will show the warning on the form.

For this scenarios, we can disable the OOB Pricing in CRM. Here are the steps for the same.

1) Navigate to Settins -> Adminstration -> System Settings -> Sales Tab
2) Set Use system pricing calculation to No
Everytime an Opportunity, Quote, Order or Invoice is created or updated the plug-in registered on the CalculatePrice executes to calculate prices as specified in the custom code of the plug-in. The CalculatePriceRequest message doesn’t have any usage scenario of its own. It’s exposed so that you can plug in your own custom pricing calculation logic if you don’t want to use the out-of-box pricing provided by Dynamics CRM.

Here is the sample code for the Plugin - Calculate Price plug-in

Hope this helps.

--
Happy CRM'ing
Gopinath