Showing posts with label CRM 2013/2015. Show all posts

Friday, 11 March 2016

Save and Save & Close buttons are not visible in CRM 2013/2015

Hi,
 
Today when we open the CRM forms observed that Save and Save & Close were not visible. When we are checking the things we found that one of our colleagues has enabled Auto-Save feature in CRM.
 
If you enable Auto-Save - Save and Save & Close buttons will not be displayed. Refer the below screen shot for more information
 
Auto Save Disabled
Save and Save & Close buttons are visible
Auto Save Enabled
Save and Save & Close buttons are not visible.
Hope this helps.

--
Happy CRM'ing

Gopinath

Thursday, 10 March 2016

Opportunity Sales Team - Access Team in CRM 2013/2015

Hi,

We all know that Access Teams was the new feature in CRM 2013. Today I was working on Access Team where I have added a sub grid on the Form with the following properties.
 
Just before adding I have seen a OOB sub grid with name connections and did search on it. To my wonder, I found that adding the records to the connections internally adds the same user to Access Team which means we don't any more new sub grid.
 
I have added new Sub Grid as per the above screen shot.
 
1) Two sub grids a) Sales Team (Connections OOB) b) Access Team Member (Custom Sub grid which was added by me)
2) Added a user in the Sales Team (Connections OOB)

3) Refresh the page, you will see the same user has been added in the Access Team which means we don't need to add any new sub grid on the Opportunity to give access to the users.
Hope this helps.
 
--
Happy CRM'ing

Gopinath

Sunday, 24 January 2016

Remove Locked Field in the Header

Hi,
 
Today, I got a business requirement to remove the Effective from and Effective to fields from the header of the quote.
 
First, I thought that would be very simple to do and opened the Quote form. And noticed that those fields are Locked fields.
 
The work around is very simple.
Add the locked fields on the form. In this case, Effective from and Effective to.

Open the Properties of the field and uncheck Visible by default.

Select the Header on the ribbon and now you will be able to remove the locked fields from the header. You can add the fields as per your requirement.
 Hope this helps.
 
--
Happy CRM'ing

Gopinath

Thursday, 3 December 2015

Retrieve Access Team Members using FetchXML in CRM 2013/2015

Hi,

Today we got a requirement to fetch the users who are added on the Access Team of the record and do some operation.

Here is the Fetch XML to retrieve the users that were added to access team.

I was using for Order entity. If you are using for any other entity, you need to change the entity name in the 2nd line and ID schema name in the 4th line of the Fetch Xand pass record Id in the filter condition.

public static void GetAccessTeamMembers(IOrganizationService iService)
{
      string strFetchXML = @"<fetch>
                             <entity name='salesorder' >
                               <attribute name='name' />
                                   <link-entity name='principalobjectaccess' from='objectid' to='salesorderid' link-type='inner' alias='poa' >
                                      <attribute name='objectid' alias='objectid' />
                                      <link-entity name='team' from='teamid' to='principalid' link-type='inner' >
                                        <link-entity name='teamtemplate' from='teamtemplateid' to='teamtemplateid' >
                                          <attribute name='teamtemplatename' />
                                        </link-entity>
                                        <link-entity name='teammembership' from='teamid' to='teamid' link-type='inner' intersect='true' >
                                          <link-entity name='systemuser' from='systemuserid' to='systemuserid' link-type='inner' >
                                            <attribute name='fullname' />
                                         </link-entity>
                                       </link-entity>
                                      </link-entity>
                                      <filter type='and'>
                                       <condition attribute='objectid' operator='eq' value='GUID_OF_THE_RECORD' />
                                        </filter>  
                                    </link-entity>
                                  </entity>
                                </fetch>";

      EntityCollection entColAccessTeamMembers = iService.RetrieveMultiple(new FetchExpression(strFetchXML));
}

Hope this helps.

--
Happy CRM'ing

Gopinath

Wednesday, 11 November 2015

The column heading cannot be empty in CRM 2013/2015

Hi,

Today I received the below error when I was importing some records to CRM using OOB import.

"The column heading cannot be empty".

Here are the steps to resolve.

1) Open the CSV file in notepad.
2) Check for a comma at the end of each row.
3) To make the things much easier, close the Notepad and open the same in Microsoft Excel.
4) Remove the blank column by selecting and deleting.
5) Save the file.
6) Open the file in Notepad again and check to make sure the comma at the end of each row has removed.
7) Import the file. This time, you won't see any error.

Hope this helps.

--
Happy CRM'ing
Gopinath

Tuesday, 10 November 2015

Security Roles Assigned to User in CRM

Hi,

Today I have been asked by one of our clients is there any way to find the security privileges that are assigned to some users in CRM Organization.

Yes, we can see. Dynamics CRM out of the box comes with a set of reports. You will find a report named "User Summary".

If you run the report, you will see table with User's information. I cannot show you the output of the report here. :)

Hope this helps.

--
Happy CRM'ing

Gopinath

Tuesday, 20 October 2015

Add a button in CRM 2013/2015 using Ribbonworkbench

Most of the times we get a requirement to add a button on the CRM OOB forms for full filling business needs.

Here are the steps for adding a button

1) Download Ribbon Work Bench solution from the following linkDownload Ribbon WorkBench
2) Import the solution to CRM.
3) Create a solution with the entities and web resources where you wanted to add a button. In my case, its on Opportunity.
4) Go to CRM-> Settings->Solutions.
5) You will see a link with name "RIBBON WORKBENCH" as shown in the below screen shot.

6) click on link and it will open a pop-up to select the solution to open.
7) The workbench all the information related to the entities from the solution.

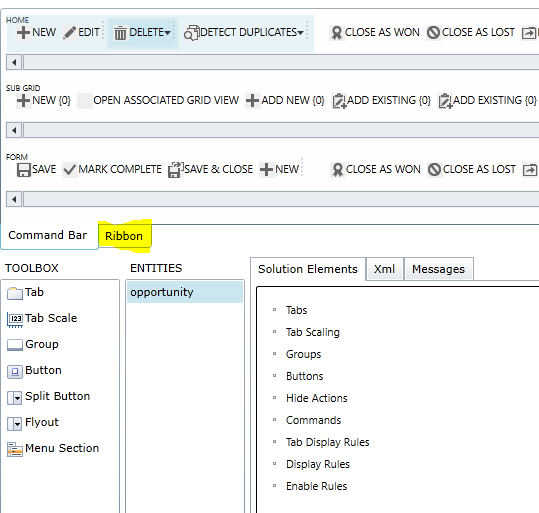
8) Click on Ribbon tab button as shown in the figure.
9) You will see a dropdown on the top right side window for selection place to show the ribbon button. In my case, I would like add a button on the Opportunity Form.

10) Drag the button from left and release it in the place where you wanted to create a button.
11) Select the button and give the details like label, description, Image etc..

12) Select Commands and click on Add New

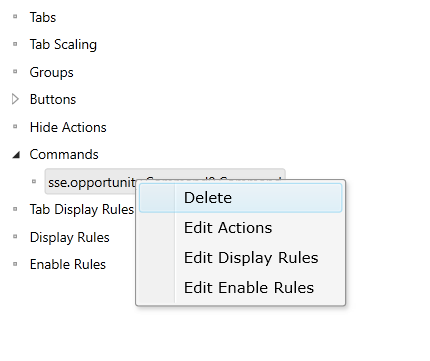
13) It will create a command for you. Expand Command and right click on the command. It will display you to select Display Rules, Actions and Enable Rules.
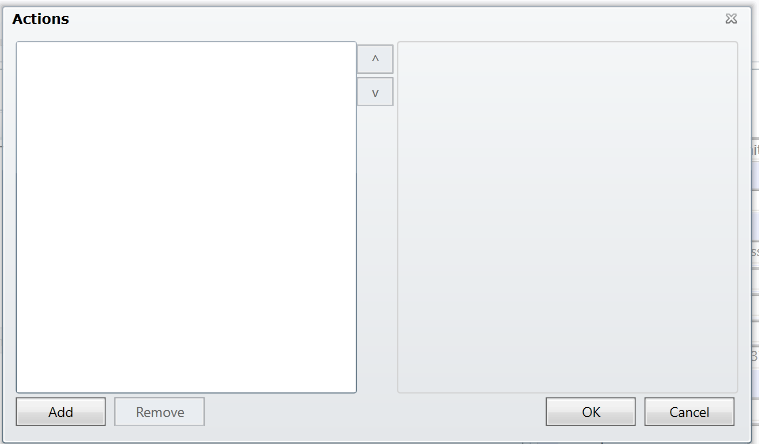
14) Select Actions and it will open a pop-up.
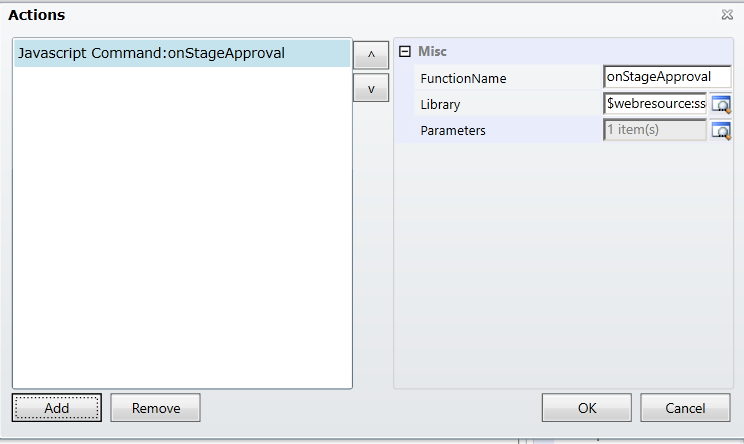
15) Click on Add button, it will open a pop-up to select a JavaScript function or a URL. If you want to open and HTML web resource or any URL, you can just give the URL by selecting the Open URL Action. If you want trigger any JavaScript method on the click of the button, select JavaScript Function Action.

 
16) Click on JavaScript Action and give Function Name which you wanted to trigger on the button click, web resource name and parameters if any.
17) Expand Buttons and select the button which was created.
18) Click on Command dropdown as shown in the screen shot. You will see the command which you have created, select that and click on Publish button on the top.


19) Click on Publish button.
Here is the output.

Hope this helps.

--
Happy CRM'ing
Gopinath

Monday, 19 October 2015

The object type cannot be added to a queue in CRM 2013/2015

Hi,

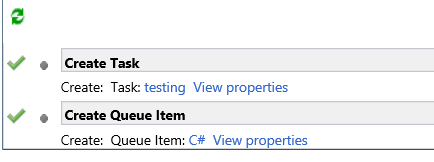
Today, I was working on the requirement where I should create a task and add to the queue. As it can be easily done using workflow I have created a workflow and added the below steps.

But unfortunately, when I ran got an error saying
 
"The record specified cannot be added to a queue. This record type is not enable for use in queues."
 
and in the details section it was logged an error with the below message
 
"The object type cannot be added  to a queue"

 
I did check for task entity the Queues are enabled by default OOB and able to a task record to the queue by clicking on Add to Queue button.

After some search I found the work around for the issue is we should enable the queues on the entity on which the workflow is configured. Even though it looks meaning less for now as we don't an option we should follow it.

Hope this helps.

--
Happy CRM'ing
Gopinath

Sunday, 18 October 2015

CRM 2015-2013 Cortana Commands

Hi,

I was exploring new features of Windows 10. We all know that Cortana is power full feature of Windows 10.

Here are the Cortana Commands for CRM.


To do this in CRM

Say this

Open an item

CRM open <item> called <item name>.

Example:

“CRM open account called Contoso.”

Variation:

“CRM open account named Contoso.”

Show a view

CRM show <view name>.

Example:

“CRM show my active accounts.”

Variation:

“CRM show me my active accounts.”

Search for an item

CRM find <item> called <name>.

Example:

“CRM find account called Contoso.”

Variation:

“CRM find account named Contoso.”

Create a new item

CRM create <item type> called <item name>.

Example:

“CRM create contact called Maria Campbell.”

Variation:

“CRM add new contact named Maria Campbell.”

Create a phone call activity

CRM remind me to call <call name>.

Example:

“CRM remind me to call Maria Campbell to set up appointment.”

Create an appointment

CRM schedule meeting to <subject>.

Example:

“CRM schedule meeting to discuss quote with Maria Campbell.”

Create a task

CRM remind me to <task name>.

Example:

“CRM remind me to email Maria Campbell.”

Variations:

“CRM follow up Maria Campbell.”

“CRM follow up with Maria Campbell.”

“CRM follow up on Contoso.”

Open task list

CRM what should I do next?

Example:


The create commands work only with Microsoft Dynamics CRM 2015 and Microsoft Dynamics CRM Online 2015 Update. The other commands work with Microsoft Dynamics CRM 2013 and Microsoft Dynamics CRM Online as well as Microsoft Dynamics CRM 2015 and Microsoft Dynamics CRM Online 2015 Update.

Hope this helps.

--
Happy CRM'ing
Gopinath