Hi,
We all know that at the time of installing Visual Studio, we get a window to select the components that we need for the development so that it automatically installs everything on the machine as per the selection.
Let's say you have not selected a component at the time of installation and later you have got a requirement to start on the new things. Here is the way to go back to the installer and select the things.
1) Search for Visual Studio Installer on your machine.

If you cannot find that on your machine, alternatively you can check at the below location or give the below path in Run window.
2) Click or tap to start the installer, and then choose Modify.
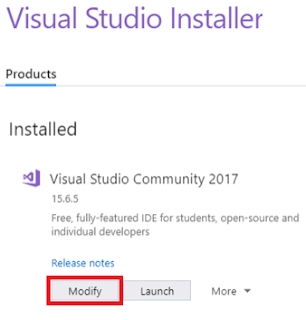
If you have an update pending, the Modify button is in a different place. This way, you can modify Visual Studio without updating it, should you choose to do so. Click More, and then choose Modify.

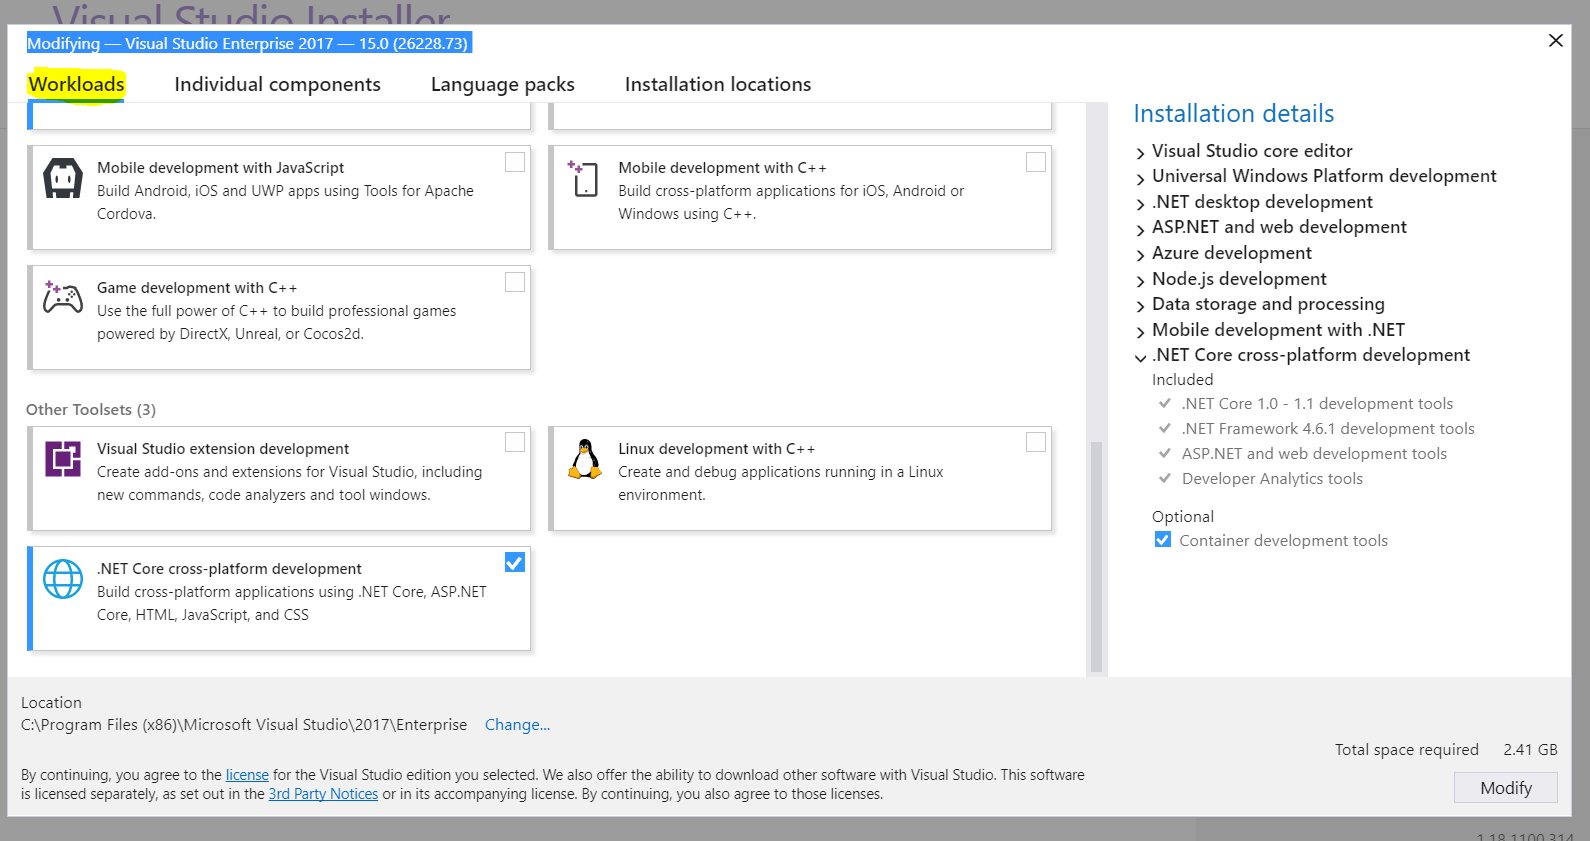
3) From the Workloads screen, select or deselect the workloads that you want to install or uninstall.

4) Choose Modify again.
5) After the new workloads and components are installed, choose Launch
Modify individual components
If you don't want to install workloads to customize your Visual Studio installation, choose the Individual Components tab from the Visual Studio Installer, select what you want, and then follow the prompts.

Hope this helps.
--
Happy Coding
We all know that at the time of installing Visual Studio, we get a window to select the components that we need for the development so that it automatically installs everything on the machine as per the selection.
Let's say you have not selected a component at the time of installation and later you have got a requirement to start on the new things. Here is the way to go back to the installer and select the things.
1) Search for Visual Studio Installer on your machine.

If you cannot find that on your machine, alternatively you can check at the below location or give the below path in Run window.
C:\Program Files (x86)\Microsoft Visual Studio\Installer\vs_installer.exe
2) Click or tap to start the installer, and then choose Modify.

If you have an update pending, the Modify button is in a different place. This way, you can modify Visual Studio without updating it, should you choose to do so. Click More, and then choose Modify.

3) From the Workloads screen, select or deselect the workloads that you want to install or uninstall.
4) Choose Modify again.
5) After the new workloads and components are installed, choose Launch
Modify individual components
If you don't want to install workloads to customize your Visual Studio installation, choose the Individual Components tab from the Visual Studio Installer, select what you want, and then follow the prompts.

Hope this helps.
--
Happy Coding
Gopinath
No comments:
Post a Comment